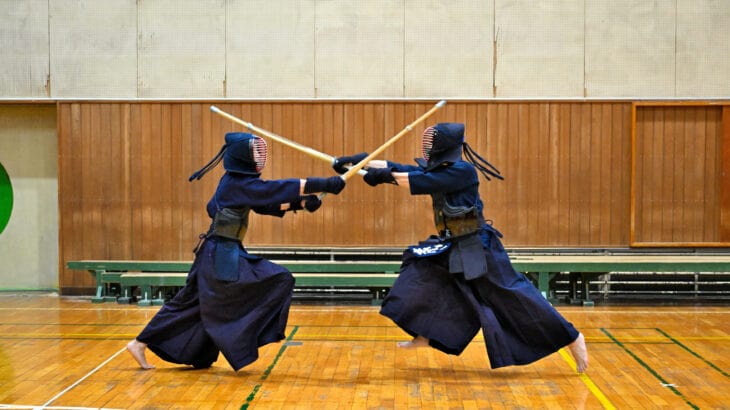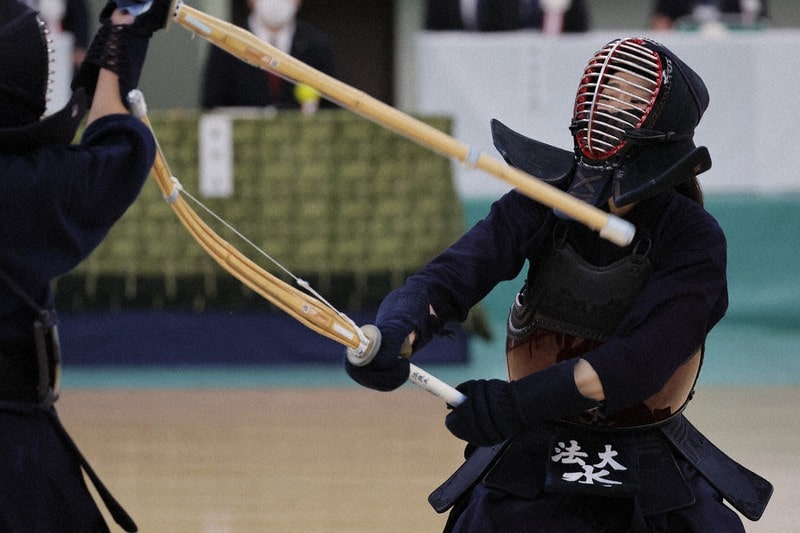
Taking photos of kendo matches and practices is especially challenging due to the speed and intensity of the movements.
However, with the right technique and knowledge, you can effectively capture Kendo’s fascinating moments.
This article covers everything from the basics of kendo photography to detailed techniques for capturing crisp, fast-moving action.
From how to adjust camera settings, how to choose a shooting position, to post-shoot editing techniques, this information will give you insight on how to improve your Kendo photography skills.
目次
Basics of Kendo Photography
Taking pictures of Kendo requires skill in capturing fast movements and correct camera settings.
Below, we will explain camera settings and basic photography techniques suitable for Kendo photography.
Proper camera settings
-
shutter speed :
- Kendo movements are very fast, so a high shutter speed is required to prevent blur. It is common to set a shutter speed of 1/500 seconds or higher, but if you want to capture faster movement, we recommend setting it to 1/1000 seconds or higher.
-
ISO settings :
- In Kendo, where many shots are taken indoors, it is often necessary to increase the ISO in order to obtain proper exposure. However, to avoid increased noise, it is recommended to limit the ISO to 1600. Depending on the lighting conditions, you may need to adjust the ISO.
-
Aperture :
- Use a lens with a wide aperture (low F-number) whenever possible to better capture movement. A lens with f/2.8 or smaller is ideal. This allows you to blur the background and make your subject stand out.
basic photography techniques
-
Continuous shooting mode :
- To capture the momentary movements of Kendo, use the camera’s continuous shooting function. Many cameras have a continuous shooting setting for the number of frames per second, and setting this to the maximum allows you to capture every good moment.
-
Utilizing autofocus :
- Use your camera’s autofocus function (especially AF-C or continuous AF mode) to keep moving subjects in focus. This makes it difficult to lose focus during fast-moving Kendo matches.
-
Proper positioning :
- Where in the match venue you shoot is also important. Generally speaking, shooting a Kendo match from the side will capture the movement better. Also, shooting from a higher position makes it easier to capture the overall picture of the match.
By mastering these basic camera settings and shooting techniques, you will be able to beautifully record the powerful scenes of Kendo.
Use these points for photo opportunities to effectively capture Kendo moments.

Tips for capturing fast-moving scenes
Kendo matches often involve very fast movements.
Capturing these moments clearly requires proper adjustment of shutter speed and focus.
Here’s a detailed explanation of how to optimize these settings.
Setting the shutter speed
-
Using fast shutter speeds :
- To freeze fast movements like Kendo, you need a shutter speed of at least 1/500 second. If you want a clearer photo, we recommend a setting of 1/1000 second or higher. This allows you to capture fast-moving subjects sharply.
-
Adjust according to your environment :
- When shooting indoors or in low-light environments, using a high-speed shutter may result in dark photos. Increasing the ISO sensitivity allows you to maintain a fast shutter speed and ensure proper exposure. However, there will be more noise, so you need to find a balance to keep the ISO as low as possible.
Adjusting focus
-
Utilizing continuous autofocus :
- The camera’s continuous autofocus (AF-C) setting is effective for keeping moving subjects in focus. This allows the camera to continue tracking the subject even if it moves, keeping it in focus at all times.
-
Focus point selection :
- Utilize multiple focus points and set them to cover areas where the subject is likely to move. For Kendo, setting the focus point slightly below the center makes it easier to focus on the moving legs and torso.
Practical shooting techniques
-
Predicted shooting :
- Observe Kendo matches in advance and predict what movements are likely to occur at what times. By reading the flow of the match, you can predict in advance the moment when a big move will occur and be ready to take the shutter action.
-
Using burst mode :
- Use continuous shooting mode (burst mode) to capture a series of actions in succession. This increases your chances of capturing the most vivid and dynamic moments.
Using these techniques, you can effectively capture the quick movements of a Kendo match.
With practice and experience, you will be able to freely manipulate these settings and techniques, and you will be able to take clearer and more powerful Kendo photos.
Positioning when photographing a Kendo match
When photographing a Kendo match, the shooting position and angle greatly affect the quality of the photo.
By shooting from the optimal location, you can capture fast-moving scenes more clearly and dramatically.
Below is some specific advice on choosing shooting locations and angles at match venues.
1. Basics of position selection
-
Shooting from the side :
- In a Kendo match, the flow of movements and techniques is easiest to understand when viewed from the side. By positioning the camera along one long side of the playing field and parallel to the line where the players are facing each other, it is possible to capture a good balance of attacking and defensive action.
-
Edge of match area :
- By shooting from a position close to the corner of the competition area, you can capture the facial expressions of the players and the tension of the match up close. From this position, you can take highly impactful photos that convey the realism of a Kendo match.
2. Ingenious angles
-
Shooting from a high position :
- If possible, try to shoot from the bleachers or from an elevated position. This allows you to get a broader view of the overall match and tactical movements. Also, shooting from a high angle is suitable for expressing the movements and footwork unique to kendo from a unique perspective.
-
Close-up shot :
- By shooting as close to the match as possible while ensuring safety, it is possible to capture detailed details such as the players’ facial expressions, sweat, and the movement of the shinai. This method is effective for capturing moments with rich emotional expression.
3. Ensuring safety
- Shooting from a safe location :
- Kendo matches involve many unpredictable movements, so we choose shooting locations with safety as our top priority. In particular, it is important to shoot while maintaining an appropriate distance from the match field. Also, please be considerate of other spectators and players so as not to disrupt the match.
Use these positioning tips to capture high-quality photos that capture the power of Kendo matches and the emotions of the players.
The beauty and intensity of kendo can be conveyed through careful filming techniques and location selection.
Enhance your photos with editing techniques
Kendo photos taken will become even more attractive with appropriate editing.
Here, we will introduce the basics of photo editing after shooting, as well as effective editing techniques specific to Kendo photos.
Basics of photo editing
-
Adjust exposure :
- Kendo matches are often held indoors, and lighting conditions can be difficult. If the photo you took is too dark, you should adjust the exposure to get the brightness appropriate. In addition to brightness, it is also important to adjust the contrast, which will add depth to the photo and make the subject stand out.
-
Adjusting the tone :
- By adjusting the color temperature and saturation, you can greatly change the atmosphere of the photo. When photographing Kendo, I often adjust the background color while maintaining natural skin tones. You can liven up your photos by making the tones a little warmer.
-
Add sharpness :
- When photographing a fast-moving Kendo match, the subject may sometimes be a little blurry. By adding appropriate sharpness using image editing software, you can make details stand out and create clearer images.
Effective editing techniques for Kendo photos
-
Background blur :
- Kendo matches tend to include many elements in the background, such as the audience and other players. By lightly blurring the background, you can reduce visual clutter and focus on your main subject. This focuses the viewer’s attention on the subject’s action.
-
Monochrome and sepia tone processing :
- By applying black and white or sepia filters to your Kendo photos, you can create a traditional atmosphere of the ancient martial arts. This not only creates visual impact, but also adds timeless value to your photos.
-
Dynamic range optimization :
- Adjust highlights and shadows to optimize the overall dynamic range of your photo. This adds depth and realism to your photos, allowing you to more realistically express the power of Kendo movements.
By using these editing techniques, you can transform your Kendo photos into something more artistic and impressive.
Editing is an important step to further improve your photos and bring out their full potential.
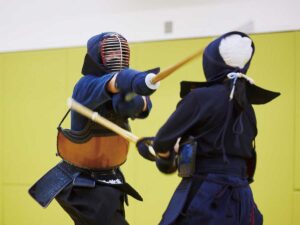
How to take pictures of Kendo practice scenes
When photographing Kendo practice, it is important to capture the seriousness of the training and the beauty of the techniques.
Below, we will suggest specific shooting strategies on how to capture important moments during practice.
1. Preparation and advance planning
- Check the practice schedule :
- By understanding the flow of practice and which techniques will be performed when in advance, you will be able to capture important moments without missing them. You can learn about practice highlights in advance by talking to instructors and experienced players, and observing previous practices.
2. Selection of appropriate shooting position
- Approaching from various angles :
- You can obtain a variety of practice shots by taking photos from different angles. For example, shooting low from one side of the dojo can emphasize the dynamism of Kendo’s footwork and movements. Also, shooting from a high position allows you to better capture the overall formation and flow of movement.
3. Techniques to capture the moment
- Utilizing continuous shooting mode :
- Quick and unpredictable movements often occur during Kendo practice. By using the camera’s continuous shooting function to capture a series of movements, you can capture the best moments without missing them.
4. Adjust lighting and exposure
- Optimization of lighting conditions :
- When practicing indoors, the lighting may not be even. Adjust your camera’s exposure settings to make sure your subject is properly lit. You can shoot in dark places by increasing the ISO if necessary, but you need to be careful not to increase noise.
5. How to understand emotions
- Facial expressions and body language :
- In Kendo practice, the athlete’s facial expressions and body language are very important. You can add depth and story to your photos by capturing emotional moments, especially when you’re practicing, or when you feel a sense of accomplishment after nailing a trick.
By using these strategies to photograph Kendo practice scenes, you can create photos that are more than just a record of your practice.
My goal is to capture powerful images that convey the beauty of the techniques, the passion of the athletes, and the spirituality of Kendo.

summary
Preparation and planning, choosing the right location, techniques to capture the moment, adjusting lighting and exposure, and capturing emotion are important when photographing Kendo practice scenes.
Check your practice schedule in advance and know practice highlights so you don’t miss any important moments.
By shooting from different angles, you can add variety and depth to your photos.
It is also important to use the camera’s continuous shooting function to capture quick movements and to adjust the exposure according to lighting conditions.
The facial expressions and emotions of the players are also important elements and can add depth and story to the photo.
Combine these strategies to create more attractive photos of your Kendo practice.
